

Technology Hack 101: A great hack if you ran out of business cards and still want to promote
Have you every went to an event and amidst all the packing forgotten the tiny box that contains your business cards? On a personal trip and had a business opportunity come up? Don’t worry, you’re not alone. The way the Universe works you usually forget something when you have an important event to go to. Take business cards off the “don’t forget “ list by creating your own virtual business cards. Scared of creating your own professional cards? Don’t worry check out the steps I took below to make my virtual business card using Canva, a free platform for business owners:
Step 1
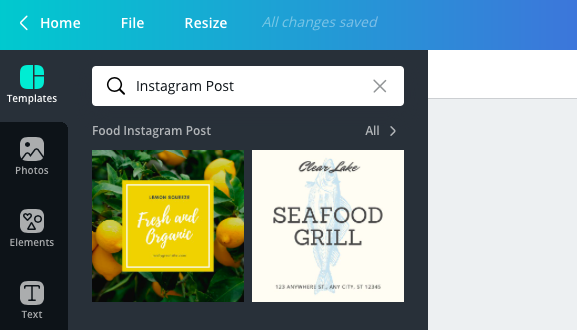
You can create a free account and start creating everything marketing related right away. The trick is making sure you select the right dimensions for your design. Canva makes this easier for you by having pre-sized templates with a short description of what they are in the bottom. For this activity I chose Instagram Post in case I wanted to post it on my business page in the future:

Step 2
Once you’ve selected your document size it will take you to the “creation station” as I like to call it. All you need to do is click on the word Template that’s on the left hand side bar and pre-designed templates will pop up:
Step 3
Once you selected a template you can start customizing it with your brand colors, renaming the text, etc. by clicking on the parts you want to change on the design. Make sure you choose a design that is completely free (i.e. if there is a little crown next to it, it’s not free)

Step 4
Keep your business card simple but informative. I would include website, social media handles, and short description of what you offer and/or the mission behind your business. A photo of yourself also personalizes your business cards and puts a “face to the name”. You can add your photo by clicking upload in the left hand side bar and uploading your picture. You than drag it to where ever you want to place it on the image:

Step 5
Click on the arrow on the right hand corner of the “creation station” once you’re done. It will ask you if you want to download your image, click “PNG” for the format style (provides a higher quality) and than click download.

Step 6
Once you’ve downloaded your business card, save it to your favorites in your photo album! Now at any event all you have to do is turn on your Airdrop to “Everyone” in your iPhone settings (just type in airdrop in the search bar) and send away!
